Raid · Mechanics guide
Order 66
Prepare squads and mods, use rescue windows and check the right tier against your roster.
Mechanics and squad variants with scoped sources. Listed builds are source examples, not newly tested minimums. Check tier modifiers and abilities in game.
Battle flow
- Defeat a bodyguard to make Vader targetable.
- Hit Vader to unlock Rescue. Tier 3 adds another required attack.
- Use the rescue window; Fox and Appo can bring bodyguards back.
- After the Jedi, surviving Enraged Vader earns further points.
Choose a tier
- Check each deployed character’s build and the in-game tier modifiers.
- Plan the five attempts first. Eligibility alone does not establish a working squad.
Squads, mods and battle plans
Tarkin solo1 character · Source example: Tier 0Written report
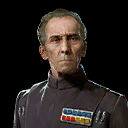 Grand Moff Tarkin
Written player report: R7 Tarkin on Tier 0. This is an example build, not a minimum requirement.
Tarkin leads alone. His basics stack Potency until the next Ultimate Firepower, whose damage scales with Potency. His unique provides recovery for a longer fight.
Prepare mods
- Grand Moff Tarkin: Three Potency sets or two Potency plus Health. Potency cross, Speed arrow, Protection circle; prioritize Potency, Speed and survival secondaries.
Battle sequence and priorities
- Use basics to ramp up; choose Fox as an early target. Intimidation Tactics supplies buffs and weakens enemies.
- Use Ultimate Firepower against the clone wave. Rebuild Potency with basics after using it.
- When the opening is safe, break Vader's concentration and use the unlocked raid ability. Watch the remaining Execute stacks.
When to restart
- Tarkin dies or remains controlled during the opening before he can ramp up.
- A Jedi is executed and your goal is a complete rescue run.
Sources for this variant
Hondo solo1 character · Source example: Tier 0Written report
 Hondo Ohnaka
Written player report: R5 Hondo on Tier 0. The zetas mentioned there are not a newly tested requirement list.
Use the original Hondo, not Pirate King Hondo. He needs at least ten Ransom stacks before his Captive is defeated, or he can escape. Ransom and Profit are different effects.
Prepare mods
- Hondo Ohnaka: Start with three Health sets. Speed arrow, Health circle/cross, Crit Damage or Health triangle; Speed and Tenacity secondaries.
Battle sequence and priorities
- Make Appo Captive with I Don't Want to Kill You Per Se. Keep the Captive alive until Hondo has ten Ransom stacks.
- Work through other accessible clones. Use Insolence? We are Pirates to cleanse and build damage; it also gives Hondo Defense Up.
- Renew Captive deliberately and repeat the rescue sequence against Vader. Avoid losing the run through an early Captive defeat.
When to restart
- Hondo escapes or the Captive dies before the required Ransom ramp.
- An execution prevents the complete rescue run you were aiming for.
Sources for this variant
New Bad Batch5 characters · Source example: Tier 0Written report
 Omega (Fugitive)
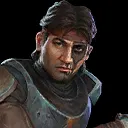 Hunter (Mercenary)
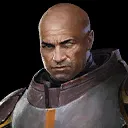 Wrecker (Mercenary)
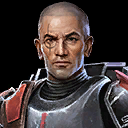 Crosshair (Scarred)
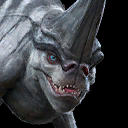 Batcher
Written Tier-0 report with five stars and roughly G10; additional creator references cover R5/R7. Early reports may reflect different tier modifiers.
Omega (Fugitive) leads the new Bad Batch. Original Hunter, Wrecker and Omega do not replace these characters. Marked, Target Practice and Crosshair's Shaken stacks drive the sequence.
Prepare mods
- Omega (Fugitive), Hunter (Mercenary): Speed plus Health. Speed arrow and defensive circle/cross primaries. Aim for frequent cleansing and squad actions.
- Wrecker (Mercenary): Health and Defense sets; Health/Protection circle and cross. Wrecker needs to survive the opening wave.
- Crosshair (Scarred), Batcher: Start with Offense plus Crit Chance; Crit Damage triangle and Offense cross. Consider an Accuracy arrow against evasion problems, otherwise Speed.
Battle sequence and priorities
- Mark one target and concentrate attacks to build Target Practice. Batcher's abilities can also reach stealthed targets.
- Initially target Crosshair himself with I Will Handle It to reduce Shaken. Then choose an appropriate Bad Batch ally for the assist.
- Save Omega's Big Sister for needed cleansing/recovery. Our Way Out distributes Stealth and defensive buffs; the healthiest ally remains visible.
- Use Hunter's This Will Hurt and Crosshair's Target Secured against durable clones. Control the remaining enemies before the next Vader rescue phase.
When to restart
- A key support dies before Marked and Stealth are established.
- Crosshair remains ineffective through Shaken while the Execute clock runs out.
Sources for this variant
Kelleran, Jocasta, Plo and Barriss4 characters · Source example: Tier 6Kit plan + creator reference
 Kelleran Beq
 Jocasta Nu
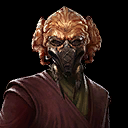 Plo Koon
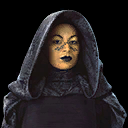 Barriss Offee
The creator lists this four-character R8 squad. Lineup and timestamp are checked; the written plan here follows current kits, not a watched replay.
Kelleran leads. All four are Galactic Republic Jedi and Jedi Vanguard. Jocasta's basic and Shhh! Quiet! need at least ability tier 6 for the Rifle transition. Protection investment supports her Rifle damage.
Prepare mods
- Kelleran Beq, Jocasta Nu: Start with Health/Defense sets and Protection circle, cross and triangle. Speed arrow; prioritize Max Protection particularly for Jocasta.
- Plo Koon, Barriss Offee: Speed plus Health for Plo; Health for Barriss. Defensive primaries and Speed secondaries for frequent support.
Battle sequence and priorities
- Use Plo's Take Charge for Defense Up and Jedi Turn Meter. Kelleran's Lightsaber Training calls assists and provides recovery.
- Jedi Vanguard special abilities reduce It Does Not Exist's cooldown. Use Jocasta's Rifle transition and Protection-based area attacks against clone waves.
- Use Barriss to equalize Health; Kelleran's Jedi Bravery cleanses the squad. Break Vader's concentration while sufficient Execute time remains.
When to restart
- Jocasta falls before her Protection-based damage can clear the planned wave. Her Rifle finisher can defeat her after attacking.
- The selected tier exceeds the four-character squad's survival capacity.
Sources for this variant
Master Mace, Depa and Temple Guard3 characters · Source example: Tier 7Kit plan + creator reference
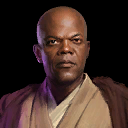 Jedi Master Mace Windu
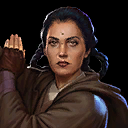 Depa Billaba
 Temple Guard
Creator reference for the R9 trio. Raid hero bonuses and the kit-based plan below do not replace a newly observed clear.
Jedi Master Mace leads, not the original Mace Windu. All three satisfy his Jedi Vanguard condition. Territory War omicrons do not apply here.
Prepare mods
- Jedi Master Mace Windu, Depa Billaba: Offense plus Health or Crit Chance; Speed arrow, Offense cross and Crit Damage triangle. Keep defensive secondaries.
- Temple Guard: Defense/Health; Protection circle and cross. Allow enough Speed for Taunt and recovery actions.
Battle sequence and priorities
- Concentrate Investigation on one clone. Mace's basic applies Shatterpoint to eligible targets; his leadership develops Investigation into Revealed.
- Use Temple Guard's Stoic Determination to Taunt. Depa's Vaapad Disciple calls the new Mace to assist twice.
- Use The Hammer of Ryloth for cleansing and area damage. Extra assists require the Investigation/Revealed conditions stated in the kit.
- Prioritize Revealed clones without losing Vader's rescue window. As a Sith, Lord Vader is not an ordinary Revealed target of this leadership.
When to restart
- Temple Guard falls before the first stable control phase.
- The attempt relies on a Territory War omicron that is inactive in raids.
Sources for this variant
Tarkin and Scorch2 characters · Source example: Tier 7Kit plan + creator reference
Grand Moff Tarkin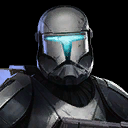 RC-1262 "Scorch"
R9 duo from the creator lineup. Tier-7 clone bonuses matter; this plan is not assumed to transfer unchanged to lower tiers.
Tarkin leads; Scorch protects him and supplies Off Balance and Damage Over Time. The title does not establish guaranteed results at lower relic levels.
Prepare mods
- Grand Moff Tarkin: Potency sets and Potency cross; Speed and robust defensive stats.
- RC-1262 "Scorch": Defense/Health with Protection circle/cross. Speed to use Entrenched before critical incoming attacks.
Battle sequence and priorities
- Use Entrenched in time for Taunt and Bulwark. Ramp Tarkin with basics.
- Scorch's Breaching Charge supplies debuffs; Tarkin recovers through Empire debuffs and uses Ultimate Firepower against the wave.
- Scorch's basic cleanses a debuffed Empire ally. Track rescue windows together with the bonuses that apply at Tier 7.
When to restart
- Scorch fails to survive the ramp or Tarkin loses several crucial turns to control.
- The run was started on a different tier with inappropriate expectations of clone bonuses.
Sources for this variant
CX-2, Appo and Disguised Clone Trooper3 characters · Source example: Tier 7Kit plan + creator reference
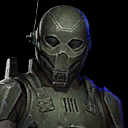 CX-2
 CC-1119 "Appo"
 Disguised Clone Trooper
R9 trio from the creator lineup; not a newly observed low-relic variant.
All three are Dark Side Clone Troopers. CX-2's and DCT's Order 66 conditions must actually be met. The Tier-7 bonus changes Turn Meter when Order 66 is applied.
Prepare mods
- CX-2, CC-1119 "Appo": Start with Speed plus Offense/Health. Speed arrows, defensive circles and Offense or Protection crosses according to survival.
- Disguised Clone Trooper: Offense plus Health; Speed arrow, Offense cross and Crit Damage triangle. Enough Speed to attack prepared targets in time.
Battle sequence and priorities
- Establish control with Appo or CX-2. Instruments of the Empire applies Disarm and Vulnerable; then keep pressure on the same target.
- Aim DCT's basic at already Stunned or Ability Blocked enemies to trigger Order 66. CX-2 can build Order 66 by using three consecutive abilities on the same target.
- Use Order 66 applications for the Tier-7 bonus. CX-2's own basic provides healing and Turn Meter against appropriately marked targets.
- After the clone wave, execute the rescue sequence. Recheck the actual modifiers when changing tier.
When to restart
- The setup/control chain breaks before a reliable Order 66 application.
- A clone falls before the first recovery phase and the trio loses its function.
Sources for this variant
Difficulty and build gates
| Tier | Requirement | Score multiplier |
|---|---|---|
| 0 | No build gate | 1× |
| 1 | G12 | 1.5× |
| 2 | R1 | 2× |
| 3 | R3 | 3× |
| 4 | R5 | 4× |
| 5 | R7 | 6× |
| 6 | R8 | 9× |
| 7 | R9 | 12× |
Allowed characters and your roster
Load your roster using your ally code to check build gates. Load roster →
 Aayla SecuraCC-1119 "Appo"Barriss OffeeBatcher
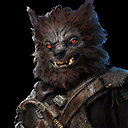 Brutus
 Captain SilvoCrosshair (Scarred)Depa BillabaDisguised Clone Trooper
 Eeth Koth
 Enfys Nest
 Pirate King Hondo OhnakaGrand Moff TarkinHondo OhnakaHunter (Mercenary)
 Ima-Gun Di
 Captain Ithano
 Jedi Consular
 Jedi Knight GuardianJedi Master Mace WinduJocasta NuKelleran Beq
 Kit Fisto
 Kix
 Luminara Unduli
 Maz KanataOmega (Fugitive)CX-2Plo Koon
 Quiggold
 Qui-Gon Jinn
 Sana StarrosRC-1262 "Scorch"
 Shaak Ti
 SM-33
 VaneTemple GuardWrecker (Mercenary)