The two resource-event victories are shared across all four tiers. Use the highest tier you can clear reliably before spending a win on a lower tier.
Team
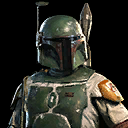 Boba Fett
 Stormtrooper Han
 Lando Calrissian
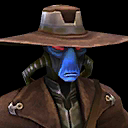 Cad Bane
 Dengar
Modding
- The encounter is designed around character level 30. This is a preparation guide, not an extra gear gate. Reuse a developed Scoundrel squad and upgrade the abilities used below.
- Mods are optional preparation for later account levels; the Tier I plan does not assume that you have unlocked them.
Gameplay
- Focus the Pirate Saboteur when present and use Boba’s area Ability Block before the pirates can cycle Specials. Han’s Taunt protects Lando while his area damage reduces the group; use Cad’s Stun on a surviving dangerous target.
- Before finishing the first two waves, use Basics on the last safe enemy to bring Boba’s control and the tank’s Taunt back. Do not prolong a wave if your tank is already at risk.
- Enter the final wave with control ready for the Pirate Leader. Keep him disabled while removing the surrounding pirates, then finish him with focused damage. Boba’s Execute is useful against a buffed enemy or a target carrying several debuffs.
- A payout is helpful, not necessary. Under Boba lead, only Bounty Hunters contribute to his contract; Han and Lando do not. Do not delay an available victory just to complete it.
Restarts & further notes
Restart if
- If the tank or main damage dealer falls before wave three, improve that unit’s survival or restore the control cooldowns before advancing. Choose a lower tier if the final boss consistently overwhelms the squad.
Watch out
- Scoundrel and Smuggler are different tags. This event accepts Scoundrels; it does not require the Smuggler’s Run faction.